Tools & Guidelines
MAGpie2 Audio Description Authoring
NEXT | CONTENTS
To move from cell to cell using the keyboard, the table must be in navigation mode. To exit editing mode and enter navigation mode, press shift + enter on the keyboard. When in navigation mode, the focus rectangle is a thin purple line.
On the audio description interface are two sets of media player controls. The set at the top of the window control the media being described, and the controls at the bottom of the window are for playback of the audio description for the row in the table that is currently selected.


© 2007 Carl and Ruth Shapiro Family National Center for Accessible Media. All rights reserved.
Starting an Audio Description Project
- Start MAGpie 2.0, open the menu and select .
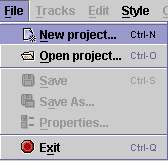
- Click on to choose the base media to which you want to add audio descriptions. This step is required.

- Choose the Apple QuickTime Player button if the base media is a QuickTime (MOV) clip; choose the Oratrix GRiNS Player button if the base media is a Real media (RM) clip. WAV, MPEG/MPG and AVI clips will open in either player. Macintosh users do not currently have use of the GRiNS player.

- Modify the video height and width to match the actual dimension of the media and set the caption height and width to be blank. Press .

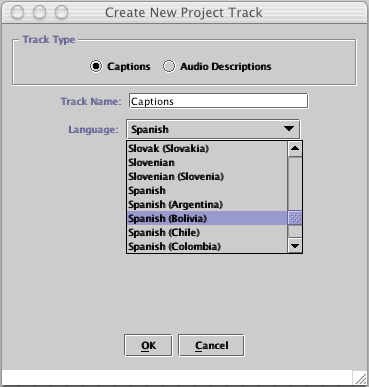
- In the dialog box, choose the track type radio button. Accept MAGpie's default track name or type in one of your own and modify the language drop-down list box value if needed. Press .
- Save the project by opening the menu and choosing . It is important to save the project file in the same directory as the base media. The audio description files created for playback will automatically be saved in the same directory as the base media. Note: for efficient file management, save each new project in a separate directory.
The Audio Description Authoring Interface
The audio description authoring interface is centered around a table where each row represents a single audio description. This table has 7 columns:- Row: The row number. Row 1 represents the first audio description.
- Media Start: "Media" refers to the media being described. Once descriptions are timed, cells in this column contain times that the descriptions are played. Audio description authors can modify the values in this column manually, but should be careful to ensure that the times entered are sequential.
- Media End: If an end time is needed for an audio description, this column will be used. This is an uncommon occurrance.
- Audio Resource: The file name for the audio description sound file.
- Audio Start: "Audio" refers to the file containing the audio description.When using an audio resource that is longer than needed for a specific audio description, it may be necessary to set the start time within the audio resource. This is equivalent to the clipBegin (clip-begin) attribute value in SMIL.
- Audio End: The end time within the audio description file that is longer than is needed for the current audio description.
- Audio transcription: Type the audio description transcript in this column if desired. MAGpie does not include any text-to-speech capabilities, but this text is useful as a script when recording descriptions in MAGpie and also can be used to create a collated text transcript along with caption text in another track.
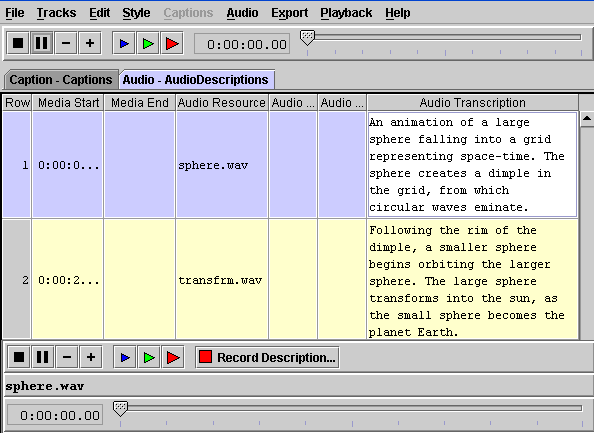
To move from cell to cell using the keyboard, the table must be in navigation mode. To exit editing mode and enter navigation mode, press shift + enter on the keyboard. When in navigation mode, the focus rectangle is a thin purple line.
On the audio description interface are two sets of media player controls. The set at the top of the window control the media being described, and the controls at the bottom of the window are for playback of the audio description for the row in the table that is currently selected.
Write Audio Descriptions
It is important to be familiar with the video that is being described. The describer needs to recognize what information is available only by visual means and is also necessary to understand the content. The describer also needs to be aware of when in the media space exists for description, since audio descriptions should not be playing at the same time as dialog or other important sounds.- Once the editor and player are visible on the screen, play the media to the point in the media where the first description will begin and press to set the time in the column. Allow the media to continue playing and press at the end of the space when the description can play. sets the end time in the column.
- The difference between the and times is the maximum length of time for the audio-description to play.
- Place the cursor in the audio-transcription cell in the first row of the editor. Type the script of the description here, keeping in mind the time limitations. The text in the Audio Transcription cells of the table can be used to create a description transcript or a collated text transcript (combining caption text and description text), so it is worthwhile to be careful to include the description exactly.
Record or Import Audio Descriptions
- Press the button at the bottom of the editor, or open the menu and choose . Plug a microphone into your computer or, if you have one, use the computer's built-in microphone. In the dialog box, press the button (or press Alt+R) and read the description script. Press the button (or Alt+S) when finished. You can listen to the audio file by pressing the button (or Alt+P). Re-record the audio as necessary. The dialog box displays the length of the recorded audio file to facilitate comparison with the maximum duration of the audio description.
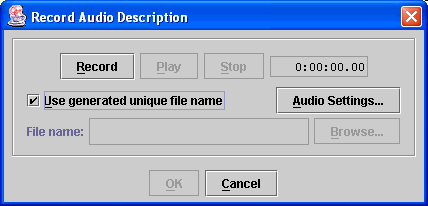
- Type a file name into the edit field in the recording dialog box, then press the button. MAGpie will insert the file name into the audio resource column of the editor. (If you are importing pre-recorded files, MAGpie will insert the file name automatically into the edit field.)
Time the Audio Descriptions
- Place the cursor in the row of the editor corresponding to the description you wish to time. Press to assign a media start time (the time at which you want the audio description to play) to the audio file. Note that the cursor will jump to the next row after MAGpie records the timecode. Press again to assign a start time to the next audio file. Continue this process until all the audio files have start times assigned to them. If you make a mistake, stop the media, rewind and re-time the files as necessary. You may also change timecodes manually.
- To create a new audio-description cell, place the cursor at the end of the text in the last Audio Transcription cell and press the key once. Transcribe, record and time each new description as described above.
Review Your Work
To review your work at any time, press to play the base media with descriptions. You can re-record, re-time and review the project as many times as you wish. Add an Additional Audio Description Track- If you want to add another audio-description track to your project, open the menu and choose . Select the button and give the track a name (or accept MAGpie's default track name). If you plan to transcribe and record new track's descriptions (or import them from another source as outlined above), press . However, if you want to use a track from the current project as a prototype for the new track, check the checkbox, select the track from the drop-down list and check the appropriate options (copy start times from other track, copy audio resources from other track, copy transcriptions from other track). Press when finished.
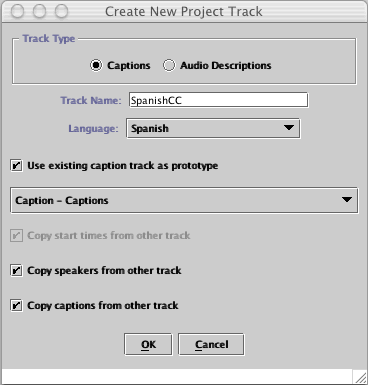
- Edit, time and review the new description track as described above. To switch between tracks, click on the track tabs at the top of the editor or open the Tracks menu and choose from the track list.
Export the Project and Test the Presentation
- When you're satisfied with your work, open the menuand choose or to export the presentation. Note: Windows Media Player does not support audio descriptions at this time.
- Open the SMIL file (projectname.qt.sml or projectname.real.smil) in the QuickTime Player or RealPlayer, as appropriate. If you find mistakes in the descriptions, make all necessary changes to the MAGpie project, re-export and test the presentation again using the appropriate player.
© 2007 Carl and Ruth Shapiro Family National Center for Accessible Media. All rights reserved.
